
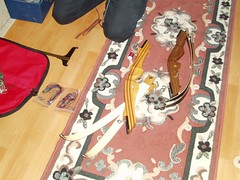
Earlier this week Richard taught me how to maintain my bow and arrows. It might sound pretty simple but it’s a labour of love. He first taught me how to dismantle and re-assemble the 28lb recurve bow I’ve been using. When it’s dismantled it looks like this (mines the lighter one):
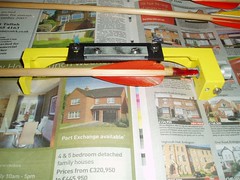
Assembling the bow isn’t as easy as it sounds. Getting the arms on is trivial but stringing the bow is actually very hard. Richard showed me a number of techniques to do this and whilst I eventually did manage to do this, I have to admit I struggled a lot it requires strength and also letting go of the fear that you might snap the bow if you bend the arms too much – although he did stress that with all these things I should get better as I get used to doing it. Once the bow is assembled it looks like this:

In the picture above you notice a small metal T Square positioned on the bow. Richard taught me how to use this to work out the correct position to put a nocking point onto the string. The nock is found at the base of an arrow and is used to keep the arrow in place on the string, the nocking point on the string is therefore the point against which you ready your arrow before shooting. A nocking point ensures that your consistently releasing your arrows from the same point on the string which aids in consistency and therefore accuracy.
Once the nocking point is found, you then create the point by wrapping cotton thread around the string at that point until you have a small ball of string that the nock at the base of each arrow can press against. The pictures below show me and Richard doing exactly this …
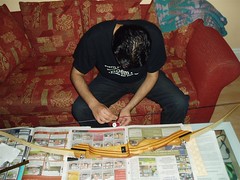

Once the strings were nocked, Richard then taught me how to wax the strings to waterproof them this basically involved rubbing copious amounts of wax into the string. Whilst you can do this with the string off the bow, Richard taught me that its easier and better to do it with the string on the bow where it’s being stretched and therefore makes it easier to work the wax into it, heres a pic of Richard doing exactly that …

Once we’d finished doing this we put the bows down and then Richard taught me how to maintain the arrows. This basically involved checking each arrow and ensuring that all the fletchings were in place, that the point of the arrow was in tact, and that the nock at the base of each arrow was also in tact. He showed me how to replace broken points and nocks, and also how to use a Fletching Jig to perfectly place fletchings on an arrow:
I learnt a great deal during that that evening from Richard, and it gave far more of an appreciation into how much effort I need to put into maintaining my archery equipment. We ordered some new shafts, fletches, points and nocks so I can create my own set of arrows … I cant wait for them to arrive, I’m actually really looking forward to creating my own arrows from scratch.
You can view all the pictures above, and more, here on flickr.
nice story ! recurve bows are great!
http://www.recurvebow.org
Pingback: VirtualChaos - Nadeem’s blog » Tutorial: Making my own Arrows