As I mentioned in an earlier post on Bow Maintenance, Richard promised to teach me how to make my own Arrows from scratch. I have documented the entire process below with pictures which you can see in more detail on flickr.
To begin with you need a number of items:
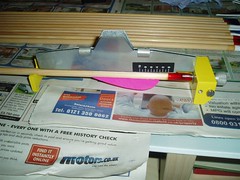
- A fletching jig
- 12 x 11/32 Wooden shafts .
- 24 x 3″ Parabolic Black Fletchings.
- 12 x 3″ Parabolic PinK Fletchings.
- 12 x Plastic Nocks
- 12 x Field Points ( 100g )
- A tenon saw
- Super Glue
- Taper Tool
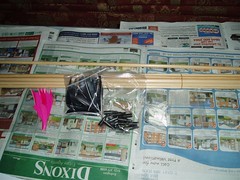
I bought all my equipment from Perris Archery and Quicks Archery. I should point out that you don’t need to buy pink and black feathers, you can buy an color you like but what you need to ensure is that you ave 3 times as many fletches as arrows you are making, and that each arrow will have two fletches of the same color, and single fletch, the cock feather, which should be a different colour. Below is a picture of all bits and pieces layed out on the table before we started …
Step 1 – Taper and Nock the Arrows.
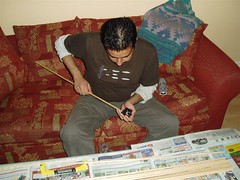
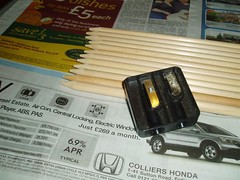
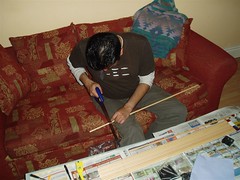
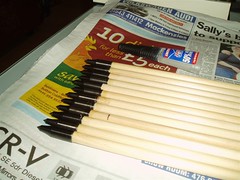
The first thing I had to do was Taper one end of each arrow. The Taper Tool is basically a special pencil sharpener that is designed to sharpen the end of a wooden shaft so that you can fit a plastic nock to it perfectly. The first picture below shows me using the Taper to sharpen the arrow, and the second picture shows all twelve arrows sharpened and the Taper Tool.
Ok at this point I am now ready to add the nocks to the arrows. Richard told me that with a dozen arrows I should have five with red nocks, four with white nocks and three with blue. This is because in field archery when you shoot at a target there are three coloured pegs from which you shoot – red, white and blue. Which denote the three distances from which you attempt to hit the target and thus score points. The coloured nocks denote which peg each arrow was shot from.
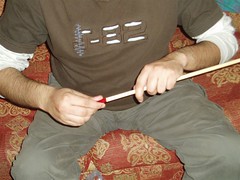
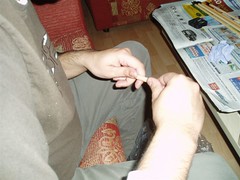
We fit each nock to the sharpened point by first pouring a few drops of super glue into the plastic nock and then twisting the nock on to the shaft. Any excess glue needs to be wiped off. The glue will dry very quickly so it’s important to ensure its a secure as possible. The first picture below shows me fitting a nock, the second shows all twelve arrows nocked.

Step 2 – Cutting the shafts to the required draw length
Once the arrows are nocked, we then had to work out what my draw length was and then cut each arrow to that length. To determine the draw length Richard asked me to draw one of the nocked arrows on my bow and took some measurements ( didn’t take any pictures of this ). Richard then showed me how to cut the arrows to this length using a tenon saw, pictured below:
Step 3 – Fitting the points
Once the arrows are cut to the same length we then need to use the Taper tool again to sharpen the other end of each arrow. The metal points are fitted in the same way as the nocks, the only slight difference is that the taper tool sharpens to a longer point. Instead of pouring glue into the fitted point you spread the glue on the sharpened shaft to ensure maximum coverage. The fitted point is harder to get on and you need to ensure that you twist it on very carefully, if slip you might drive it into your hand which hurts:
Step 4 – Fletching the Arrows
This is the slowest and most tedious of the activities. The fletches must be glued onto each arrow using the fletching jig. You first glue on the cock-feather. When you shoot and arrow the cock-feather always points away from the bow at 90 degrees, this ensures that the other two fletches dont strike the bow full on as the arrow flies off the string, as a result many archers choose to use a different coloured feather to ensure their arrows are always shot consistently.
You insert the fletching into a clamp and apply a thin layer of glue to its edge. The clamp and the fletching jig are magnetic this ensures that each fletching can be positioned perfectly. As you glue each fletching and remove the clamp you twist the end on the fletching jig which rotates the shaft to the next position and repeat this until all three fletchings have been glued on.
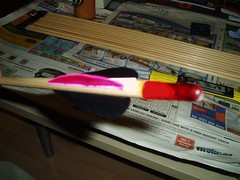

Once the arrows are flectched your basically done. However Richard and I spent some time designing and printing out some decals on transparent film for our arrows – these have the club logo on them and, in this instance, my name, in case I loose any arrows during a field shoot the organisers can always send them back to the club if they are recovered by other archers. Here’s a couple of pics of the finished product …
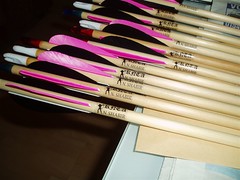
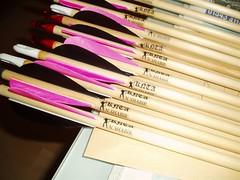
All in all it took about 90 minutes to make these from scratch under Richard’s expert tutelage. I found myself feeling a surge of pride when I finally strung one of the finished arrows on the bow, although the pink + black fletchings might not be to everyone’s taste they are certainly … distinctive … and look quite stunning. I can’t wait to shoot them! I found the experience to be very therapeutic, it’s the sort of thing you can do whilst watching a DVD ( as we did this evening ).